Technology
Ways to increase connection speed, bandwidth and stability of your Wi-Fi network
on
March 29, 2022
Slow Wi-Fi can interrupt Zoom meetings, cause chaos in online worlds, and pause your video stream for buffering. When your world relies on near-instant connections, these little inconveniences add up quickly and become frustrating obstacles to work, school, and life in general.
No one wants that—so we’ll walk you through ten simple steps to get faster Wi-Fi connections.
Before you get started, run our internet speed test. It’s not part of our official list of ten things, but it’s good for context. Use your first speed test result as a baseline and compare the results as you go through each step—that way, you know if it’s helping.
You could also compare the results, to the maximum speed advertised with your internet plan. That way, you know if your speeds are actually underperforming or if it’s just time to upgrade to a faster plan.
Keep in mind, many ISPs guarantee speeds only over a wired Ethernet connection. It’s totally acceptable, even somewhat expected, to have a lower number than your advertised maximum speed, especially over Wi-Fi. What’s important is that you’re having a smooth browsing experience.
If your speeds are near where they should be, but you find yourself with sluggish internet, you’re probably overwhelming your current connection and need a faster internet plan.
1. Turn things off and on again
First, let’s power cycle everything to see if your Wi-Fi speed improves.
Restart your modem
Unplug your modem or wireless gateway, wait 30 seconds, and then plug it back in. This process allows the modem to clear its virtual head.
Your modem translates internet signals between your home network and your internet provider. If your internet is acting up, a power cycle is a good place to start troubleshooting as it often fixes connection issues. But sometimes you need a customer support agent to reset your modem remotely and make sure it’s properly calibrated to translate your internet connection’s signals.
Restart your router
Next, repeat the process if you have a standalone router. Like with the modem, a power cycle clears your router’s memory and gives it a fresh start on tasks that were bogging it down before.
Finally, turn off the Wi-Fi on all your wireless devices. Wait a few seconds and then toggle Wi-Fi back on. Allow these devices to reconnect and see if your connection improves.
A power cycle might seem simplistic, but turning your home networking equipment off and on again can really give your network a boost. We recommend rebooting your equipment regularly—at least once every few months. But keep in mind that doing this will leave you without internet for a few minutes, so plan to restart your equipment at a time when no one needs an internet connection.
2. Move your router to a better location
Wi-Fi can travel only so far, and its signals can get interrupted or blocked by walls, floors, ceilings, furniture, appliances, and basically any large physical object. These signals can also get interrupted by radio waves from other devices, including cordless phones, baby monitors, microwaves, and Bluetooth speakers.
So if you place your router in a corner, you may have issues with Wi-Fi at the other end of your home. The best place for your router is in a central and elevated location, near where you use the internet most often. Don’t relegate your router to a basement or closet—that’s just setting yourself up for connectivity issues.
3. Switch your Wi-Fi frequency band
Modern routers work primarily on two radio frequency bands: 2.4 GHz and 5 GHz. The band you use for your connections can affect your speeds and the quality of your connections at different distances from your router.
Whatever frequency band you’re on may be experiencing some temporary interference, so try switching to the other band. It will show up as a different Wi-Fi network on your device, usually with a label in the network name that identifies the network as either 2.4 Ghz or 5 Ghz.
The 2.4 GHz band is the most commonly accessed Wi-Fi connection. It’s used for many other wireless communications other than Wi-Fi, so the airwaves in this frequency can be a little crowded. This band trades speed for range—meaning it’s better at passing through walls and other objects—whereas 5 GHz has better speeds but a shorter range.
The two frequency bands often appear as two separate Wi-Fi networks. To reorganize your connections, log off from the incorrect band and connect to the correct one on each device.
|
Connections best for 5 GHz band:
|
Connections best for 2.4 GHz band: |
|
|
|
|
|
|
|
4. Adjust your router’s antennas
Many routers and wireless gateways have internal antennas—meaning they’re mounted inside the device, and you can’t adjust them. If that’s the case for you, skip this step.
But if you do have adjustable antennas on your router, try reconfiguring them. Router antennas are usually omnidirectional, which means they send out signals in all directions perpendicular to the antenna. For example, a vertical antenna sends out Wi-Fi signals horizontally and vice versa.
So if you need to stretch your Wi-Fi signals to multiple floors, adjusting an antenna to sit horizontally to spread Wi-Fi signals up and down could help.
Related: Time To Get Rid Of Your Old Router And Get A New One, Here's Why
5. Extend your Wi-Fi network
If your router is in the best location but you’re still having speed or connectivity issues in certain areas of your home, you may need to add a device that can stretch your network’s range.
There are a few different devices you can use to increase the reach of your network:
- Wi-Fi boosters sit between your router and the dead zone and either amplify or redistribute existing Wi-Fi signals into the new area.
- Wired access points connect to your router via an Ethernet cable and can distribute Wi-Fi and LAN signals as an extension of your router, similar to a Wi-Fi booster. Many devices can be used as access points, including old routers.
- Powerline extender kits come with two devices—you connect one to your router via Ethernet and plug it into an outlet. You plug the second one in where you want better Wi-Fi, and the internet signals travel through your electrical wiring.
- Mesh Wi-Fi systems replace your router with one or more devices that work together to create a single Wi-Fi web that blankets your whole home from multiple points.
While all these work to push your Wi-Fi farther, the best one for your network depends on your home’s floor plan. If you have just one stubborn dead zone, a booster would probably be a good fit. Mesh systems are better for full-house coverage if your home is particularly large or has a complicated layout. And using an access point would be ideal if your house is wired with Ethernet.
6. Prune unnecessary connections
If you’re running low on bandwidth, you should disconnect all unused devices. Everything connected to your network should be essential.
The quickest way to disconnect nonessential devices is to change your Wi-Fi passwords and reboot your router. You will then need to log back in to your network with the new password on every device you currently use. This method will purge all unnecessary connections, like the emergency cell phone you keep turned on that still quietly downloads updates.
Pro tip:
Your router may come with a home networking app like NETGEAR Genie, TP-Link Tether, or Xfinity xFi that can show you what devices are connected to your network. If you have an app like this, you could easily find errant connections and disconnect them without having to disrupt your whole Wi-Fi network. Your router’s web interface should have a similar map of all your networked devices.
7. Change your Wi-Fi frequency channel

The 2.4 GHz and 5 GHz bands divide into channels: 11 in the former and 45 in the latter. Most routers automatically choose the best channel for you, but sometimes you need to change them manually.
Frequency channels can get crowded, so if you and all your neighbors use the same channel in the 2.4 GHz band, that could affect your Wi-Fi speeds.
To find the best Wi-Fi channel, you can use the Wireless Diagnostics feature on a Mac computer—just hold down the Option key and click the Wi-Fi icon on the menu bar in the top right corner of your screen. The Scan window will list the best 2.4 GHz and 5 GHz channels available to you.
On Windows, you can use a command in Windows PowerShell to see all the available channels or install an app like NetSpot. These methods don’t summarize the best channels for you but instead require you to determine the best channels by examining the scan’s results.
To change your Wi-Fi to the best channel, you’ll need to log in to your router’s online interface. You can do this by typing your router’s IP address into a web browser and logging in. Once logged in, look for your Wi-Fi settings. The option to change your band channel should be there.
8. Upgrade to faster internet
While we hope these tips will do the trick for you, sometimes your internet connection is simply too slow to sustain your internet consumption. If that’s the case, you’ll need to upgrade to a faster internet plan to get better speeds.
Unsure what internet speeds you need to support your online habits? Check out our guides to internet speed for online gaming and video streaming requirements.
And if you’re confused because you’re sure you’ve paid for enough internet speed but your connection still doesn’t cut it, that might be because your internet connection doesn’t always perform at 100%.
Internet providers advertise speeds up to a certain speed—they don’t promise that you will always get those speeds. So even if you have a 100 Mbps plan, you might not always get that much bandwidth. In that case, you might need a bit of a buffer or a plan that’s actually faster than you think you would need. That way, network slowdowns will still happen, but you’ll probably notice them less.
9. Replace your equipment
Your router and modem process all your internet data—if either one isn’t up to that task, it can slow down your whole network. So if you’re dealing with older, out-of-date equipment, it’s time to get a replacement.
If you rent equipment from your internet provider, you can request new units if you believe they’re out of date—especially if they’re causing poor network performance. Internet providers supply either a single wireless gateway or pair a standalone modem with a router.
Buying your own modem and router could save you money over time, especially if you’re renting both. A store-bought router, for instance, usually gives you more control over the features, speeds, and security of your home network.
If you’re in the market to purchase a new modem or router, we recommend a DOCSIS 3.1 cable modem like the ARRIS Surfboard SB8200. It sets you up for 10 Gbps cable internet when the connection becomes available. A Wi-Fi 5 or Wi-Fi 6 router like the Google Nest Wifi or ASUS RT-AX86U are also great choices.
If you want more recommendations for a new modem or router, check out some of our favorites:
10. Update your router’s firmware
If you have a modem/router combo unit (also called a gateway), your ISP probably updates the unit’s firmware for you automatically. But if you have your own separate router, it may be worth checking for updates.
Your router is a small computer dedicated to network management and traffic routing. Like any computing device, it requires an operating system—in this case, firmware. Since no software is entirely perfect, developers release updates that optimize the code, stomp out pesky bugs, and fill security gaps.
Keeping the firmware current is a major priority for performance and security. Many newer routers have automatic firmware updates, but checking the firmware version can give you better peace of mind. Log in to your router and verify that automatic updates are toggled on. If not, update your router’s firmware immediately and then switch on automatic updates.
Bonus tip for faster internet
Wi-Fi is great, but wired connections are faster and more reliable. If you have high-priority devices like a desktop, gaming console, or smart TV, it might be worth your while to plug them in to your router with an Ethernet cable instead of relying on Wi-Fi.
Wi-Fi technology is becoming more and more popular and widespread. Many modern devices (smartphones, tablets, laptops, routers, TV) use Wi-Fi. The most common at the moment is the IEEE 802.11n standard.
The main characteristics of a Wi-Fi network are coverage area, connection speed and quality. In some cases, you may want to choose a parameter that is most important to you. Decide what you need most: maximum coverage, fast or stable connection.
Users periodically have questions about the speed and stability of Wi-Fi devices. The most common of these are:
- Why is the actual data rate significantly lower than that displayed in wireless status?
- Why is the connection speed 54 Mbps or lower when connecting a wireless adapter that supports 802.11n?
- Where is the promised 300 Mbps (or 150 Mbps) speed when connecting wireless devices to a router in 802.11n standard?
- How do I properly configure wireless network devices to operate efficiently, consistently and at the highest speed possible, taking full advantage of the IEEE 802.11n standard?
This article will answer these questions and look at some of the most effective ways to increase a Wi-Fi network's connection speed, bandwidth, and stability when using 802.11n.
1. Maximum data rate and connection speed (channel rate) are different things
To begin with, many users incorrectly focus on the connection speed (in megabits per second), which is displayed in the connection information. For example, in the Windows operating system, it is shown in the 'Speed' field on the 'General' tab of the 'Status' window of the wireless connection.
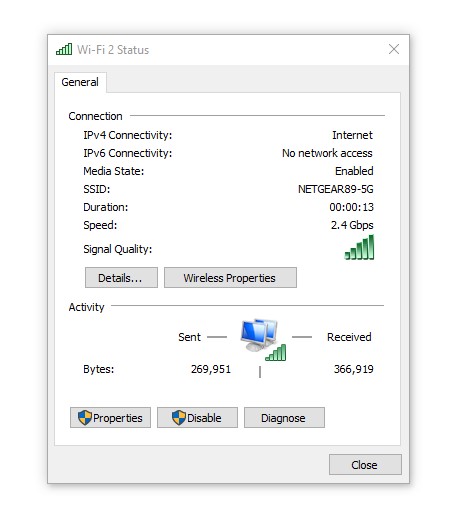
The wireless adapter driver displays this number. It shows what connection speed at the physical layer is currently used within the selected standard, i.e. the operating system only reports the current (instantaneous) physical connection rate (called channel rate).
The actual bandwidth of the connection may be significantly lower during data transmission. The real data transfer rate depends on many factors, such as 802.11n access point settings, the distance between the client and access point, the number of wireless client adapters simultaneously connected to it, etc. The difference between the connection speed that Windows shows and actual data rates are primarily due to the amount of service data, wireless packet loss, and retransmission costs.
For information on checking wireless network transmission rates, see the following article Actual connection speed in Wi-Fi technology.
2. 802.11n standard's benefits work only for 802.11n adapters
The 802.11n standard uses various technologies, including MIMO, to achieve higher bandwidth. Still, these are only effective for clients that support 802.11n specifications (for information on this, see the article 'What you need to know about Wi-Fi 4'). Keep in mind that using an 802.11n wireless access point does not increase the performance of existing 802.11b/g clients.
3. If possible, do not use outdated Wi-Fi devices on your network
With an 802.11n access point-based wireless network, you can use devices from previous standards. An 802.11n access point can work with 802.11n adapters and older 802.11g or even 802.11b devices simultaneously. The 802.11n standard provides mechanisms to support legacy standards. 802.11n client speed is reduced (by 50-80%) only when slower devices actively transmit or receive data. For maximum performance (or at least verification) on an 802.11n wireless network, it is recommended that only clients of this standard be used on the network.
4. Why is the connection speed only 54 Mbps or lower when connecting an 802.11n adapter?
4.1. Most 802.11n devices will experience an 80% reduction in bandwidth when using legacy WEP or WPA/TKIP security methods. The 802.11n standard specifies that high performance (over 54 Mbps) cannot be achieved using one of the above methods. The only exception is for devices that are not 802.11n certified.
If you don't want speed degradation, use the AES (IEEE 802.11i security standard) WPA2 wireless network security method or an even more secure one.
4.2. In some cases, when using an 802.11n Wi-Fi adapter and an 802.11n wireless access point, only the 802.11g standard is connected. This situation may be because the default access point has WPA2 technology with the TKIP protocol preinstalled in the wireless network security settings. Again, the recommendation is that in WPA2 settings, use the AES algorithm instead of TKIP and then connect to the access point using the 802.11n standard.
Another possible reason to connect only on 802.11g is that Autodetect mode (802.11b/g/n) is selected in the access point settings. If you want to establish a connection on the 802.11n standard, do not use the 802.11b/g/n autodetect mode, but manually set the connection to use only 802.11n. But remember, in that case, 802.11b/g clients will not connect to a wireless network, only clients that support 802.11n.
5. Use the 5 GHz band
Some routers support dual-band Wi-Fi, a dual-band 2.4 and 5 GHz access point. Almost all Wi-Fi networks now operate on the 2.4 GHz frequency. The more devices are working on the same band, the more they interfere with each other, which significantly reduces the quality of the connection. This statement is especially true in apartment buildings, where Wi-Fi devices are available in almost every apartment. The advantage of the 5 GHz frequency is free radio broadcasting, as this frequency is rarely used so far, and as a result, there is minimal interference and maximum connection quality. Your smartphone, tablet, laptop or USB adapter must support this frequency to use the 5 GHz network.
When using the 5 GHz band, we recommend selecting channels 36, 40, 44 and 48 as they do not use Radar Coexistence mode (DFS).
6. In some cases, it is recommended to reduce the Wi-Fi signal power at the access point to 50 - 75%
6.1. Using too much emitted Wi-Fi signal power does not always mean that the network will work steadily and quickly. High signal strength can cause additional interference and errors in the network. If the radio in which your access point is operating is heavily loaded (you see many wireless networks when you view them, and their signal strength is high), the impact of intra- and interchannel interference may be affected. This interference affects the network's performance as it dramatically increases the noise level, resulting in poor communication stability due to the nonstop forwarding of packets. In this case, reducing the transmitting power at the access point is recommended.
If you didn't find the transmitter power reduction setting at the access point, you could do it in other ways: increase the distance between the access point and the adapter as much as possible; remove the antenna at the access point (if the device has this option); use an antenna with a lower gain (e.g. 2 dBi instead of 5 dBi).
6.2. The power of the access point transmitter in the router is usually 2-3 times higher than on mobile client devices (laptop/smartphone/tablet). There may be places in the network coverage area where the client will hear the AP well, and the AP will hear the client badly or not hear at all (a situation where the signal on the client device is present, and the connection is not). As an option, the transmitter power at the AP can be reduced to obtain a more stable connection,
7. Make sure that the access point and adapter support and enable WMM mode
WMM (Wi-Fi Multimedia) mode must be enabled for speeds above 54 Mbps.
The 802.11n specification requires devices to support the 802.11e standard (QoS for improved wireless performance) to use the High Throughput mode, i.e. speeds above 54 Mbps.
WMM mode support is required for devices that are certified to use the 802.11n standard. We recommend enabling WMM mode by default in all certified Wi-Fi devices (access points, wireless routers, adapters).
Please note that WMM mode should be enabled on both the access point and wireless adapter.
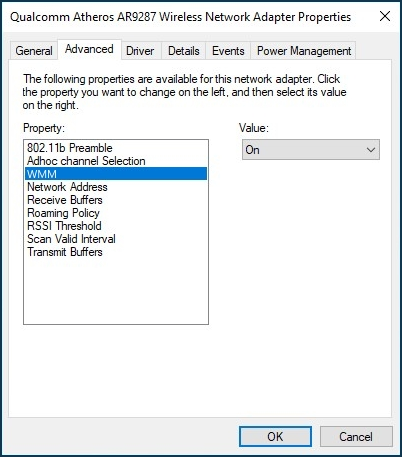
WMM mode in the settings of different adapters can be called differently: WMM, Multimedia environment, WMM Capable, etc.
8. Disable 40 MHz and 80 MHz channel usage
The 802.11n standard provides for the use of 40 MHz broadband channels to increase bandwidth (802.11ac can use a channel width up to 160 MHz).
40 MHz channels are more susceptible to interference and may interfere with other devices, causing performance and reliability problems, especially with other Wi-Fi networks and other devices operating in the 2.4 GHz band. 40 MHz channels may also interfere with other devices using this range (Bluetooth devices, cordless phones, neighbouring Wi-Fi networks).
In reality, changing the channel width from 20 MHz to 40 MHz (or using 'Auto 20/40' channel width selection mode in some devices) can even result in a reduction rather than an increase in bandwidth. Reduced bandwidth and unstable connections may occur despite the channel rate figures, which are twice as high when using 40 MHz channel width. As the signal level drops, using a 40 MHz channel becomes much less efficient and does not increase bandwidth. With 40 MHz channel width and weak signal strength, the bandwidth can be reduced to 80% and does not lead to the desired increase in bandwidth.
Sometimes it is better to use a stable channel rate of 135 Mbps than an unstable 270 Mbps.
The real benefits of using a 40 MHz channel (in particular, an increase in bandwidth from 10 to 20 Mbit/s) can usually only be achieved with stable signal conditions and a small number of transmitters in the frequency band. The use of a 40 MHz channel width is justified in the 5 GHz frequency band.
If you have decided to use a 40 MHz channel and have noticed a slowdown (not the channel connection speed that is displayed in the web interface in the 'System dashboard' menu, but the rate of loading web pages or receiving/transmitting files), we recommend using a 20 MHz channel. This way, you can increase the bandwidth of the connection.
Also, it is possible to establish a connection with some devices when using a 20 MHz channel (no connection is established with a 40 MHz channel).
What for the operation of mobile devices in the 5 GHz range, the default channel width of the router is 20/40/80 MHz. If you notice a speed drop when working on a 5 GHz network, we recommend you set the channel width to 20/40 MHz.
9. Use the latest wireless adapter driver
Low connection speed can be a result of the poor compatibility of drivers from different Wi-Fi equipment manufacturers. It is not uncommon to get a significant speed boost by installing another version of a wireless adapter driver from its manufacturer or the chipset manufacturer used in it. Visit the manufacturer's websites for your wireless devices and laptops to check for new drivers and other updates. Install the latest version of your wireless adapter drivers.
10. For Apple devices
10.1. To increase the speed of the Wi-Fi Keenetic network with some Apple devices can help change the country to the United States. This setup can be done through the web interface in the wireless network settings in the 'Country' field.
10.2. In some devices, the transmitter power is reduced by about half on the outermost channels (1 and 11/13 for 2.4 GHz). Try channel 6 to increase coverage.
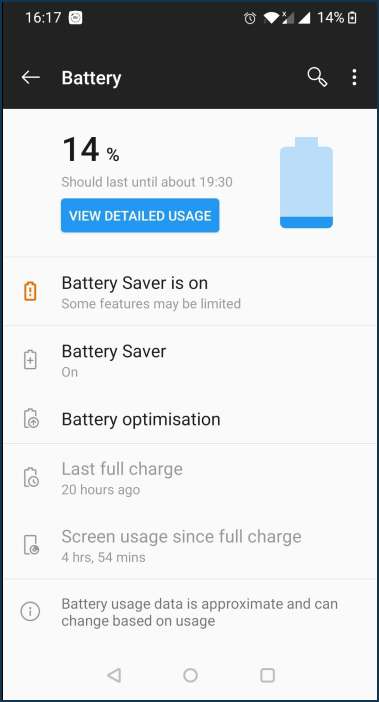
11. Turn off power-saving mode
Low Wi-Fi connection speed can be observed in some mobile devices with power-saving mode activated (sleep mode). It can affect the operation of the Wi-Fi client's wireless adapter. Manually turn off this mode to verify the connection. On some devices, the power-saving mode is automatically activated when the battery charge level is set to a specific limit (for example, when the charge is below 20% or 15%). If you do not know how to turn off the power-saving mode in the operating system settings, we recommend that you make sure that the battery level does not fall below a certain level (in some systems, the battery indicator in the status bar changes its colour to yellow).
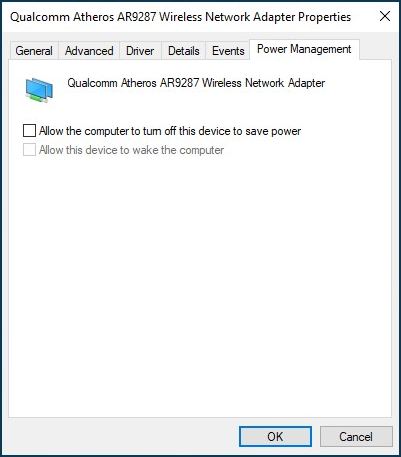
On a Windows laptop, in the wireless adapter properties on the 'Power Management' tab, try disabling the 'Allow the computer to turn off this device to save power' option. For example:
You may also experience low Wi-Fi speeds after your device leaves sleep mode. In this case, try to turn the device off (shut down the system) and turn it back on again.
12. Remove service class
A service class may have been set for the home network device in the router settings. If a service class is used, the network hardware accelerator (ppe hardware; hwnat) is disabled for this device, as the accelerator is not able to handle traffic prioritisation. With the accelerator switched off, the speed may be reduced. Try removing the value in the 'Service class' field on the 'Device Lists' page (set it to 'Not set').
So, we looked at just a few ways to increase the Wi-Fi network's connection speed, bandwidth, and stability. But don't forget that other factors (such as device location and distance, the amount of interference in the wireless signal path, the presence of a large number of Wi-Fi devices operating within your device's range and using the same frequency range, etc.) affect the performance of Wi-Fi networks.


Related Products
-
 -7%
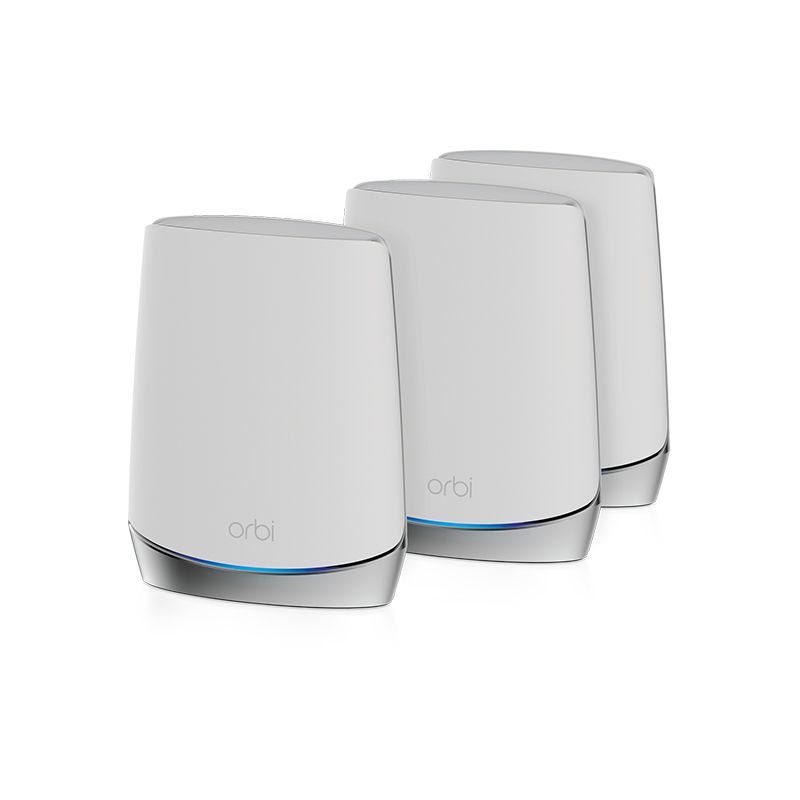
NETGEAR Orbi Tri-Band WiFi 6 Mesh System, 4.2Gbps, Router AX4200 WiFi Mesh System (RBK753)Special Price $648.00 Regular Price $699.00
-7%
NETGEAR Orbi Tri-Band WiFi 6 Mesh System, 4.2Gbps, Router AX4200 WiFi Mesh System (RBK753)Special Price $648.00 Regular Price $699.00 -
-45%
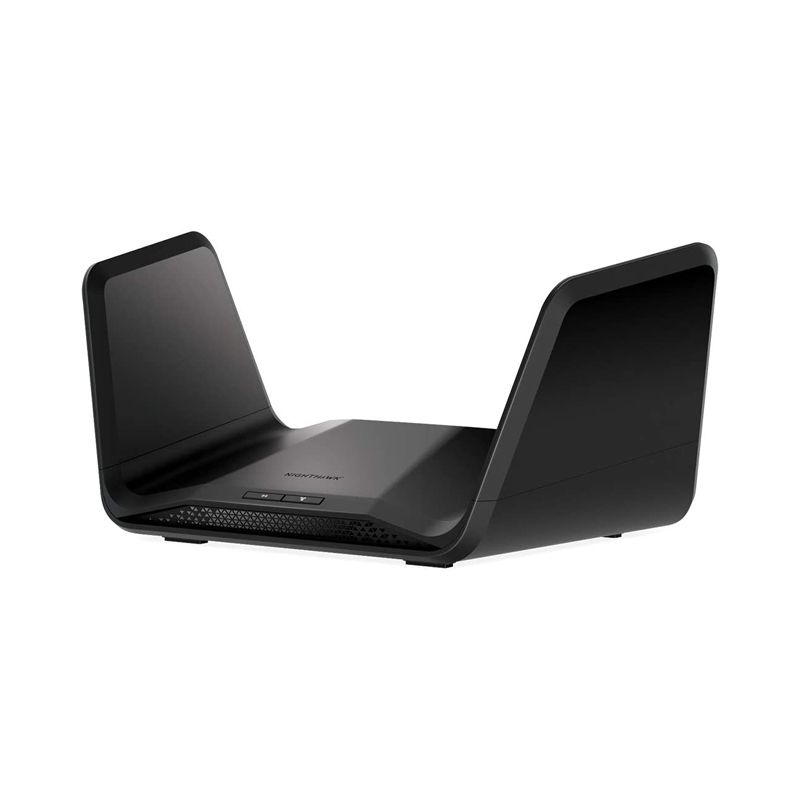
NETGEAR Nighthawk 8-Stream Tri-band AX8 Wi-Fi 6 Router (RAX70) – AX6600 Wireless Speed (Up to 6.6 Gbps) | 2,500 Square Feet CoverageSpecial Price $187.60 Regular Price $341.00
-
-62%
Google AC-1304 WiFi System 1 Pack Solution Single WiFi Point Router for Whole Home CoverageSpecial Price $49.99 Regular Price $129.99
Comment(s)
Recent Posts


Popular Posts

December 08, 2025

December 07, 2025