iPhone Privacy Settings 2025: Lock Down Your Data in 10 Minutes
iPhone Privacy Settings Ultimate Guide: Lock Down Your Data in 10 Minutes
Your iPhone knows where you go, who you talk to, and what you buy. But did you know 99% of users never truly secure it?
Apple built the world’s strongest privacy system — but the defaults are not enough.
In just 10 minutes, follow this guide to enable 8 critical settings and turn your iPhone into a mobile vault.
1. One-Tap Kill: Stop App Tracking Across the Web
Settings → Privacy & Security → Tracking
Turn OFF “Allow Apps to Request to Track”
Result: Apps can no longer follow you across websites and other apps. No more creepy targeted ads.
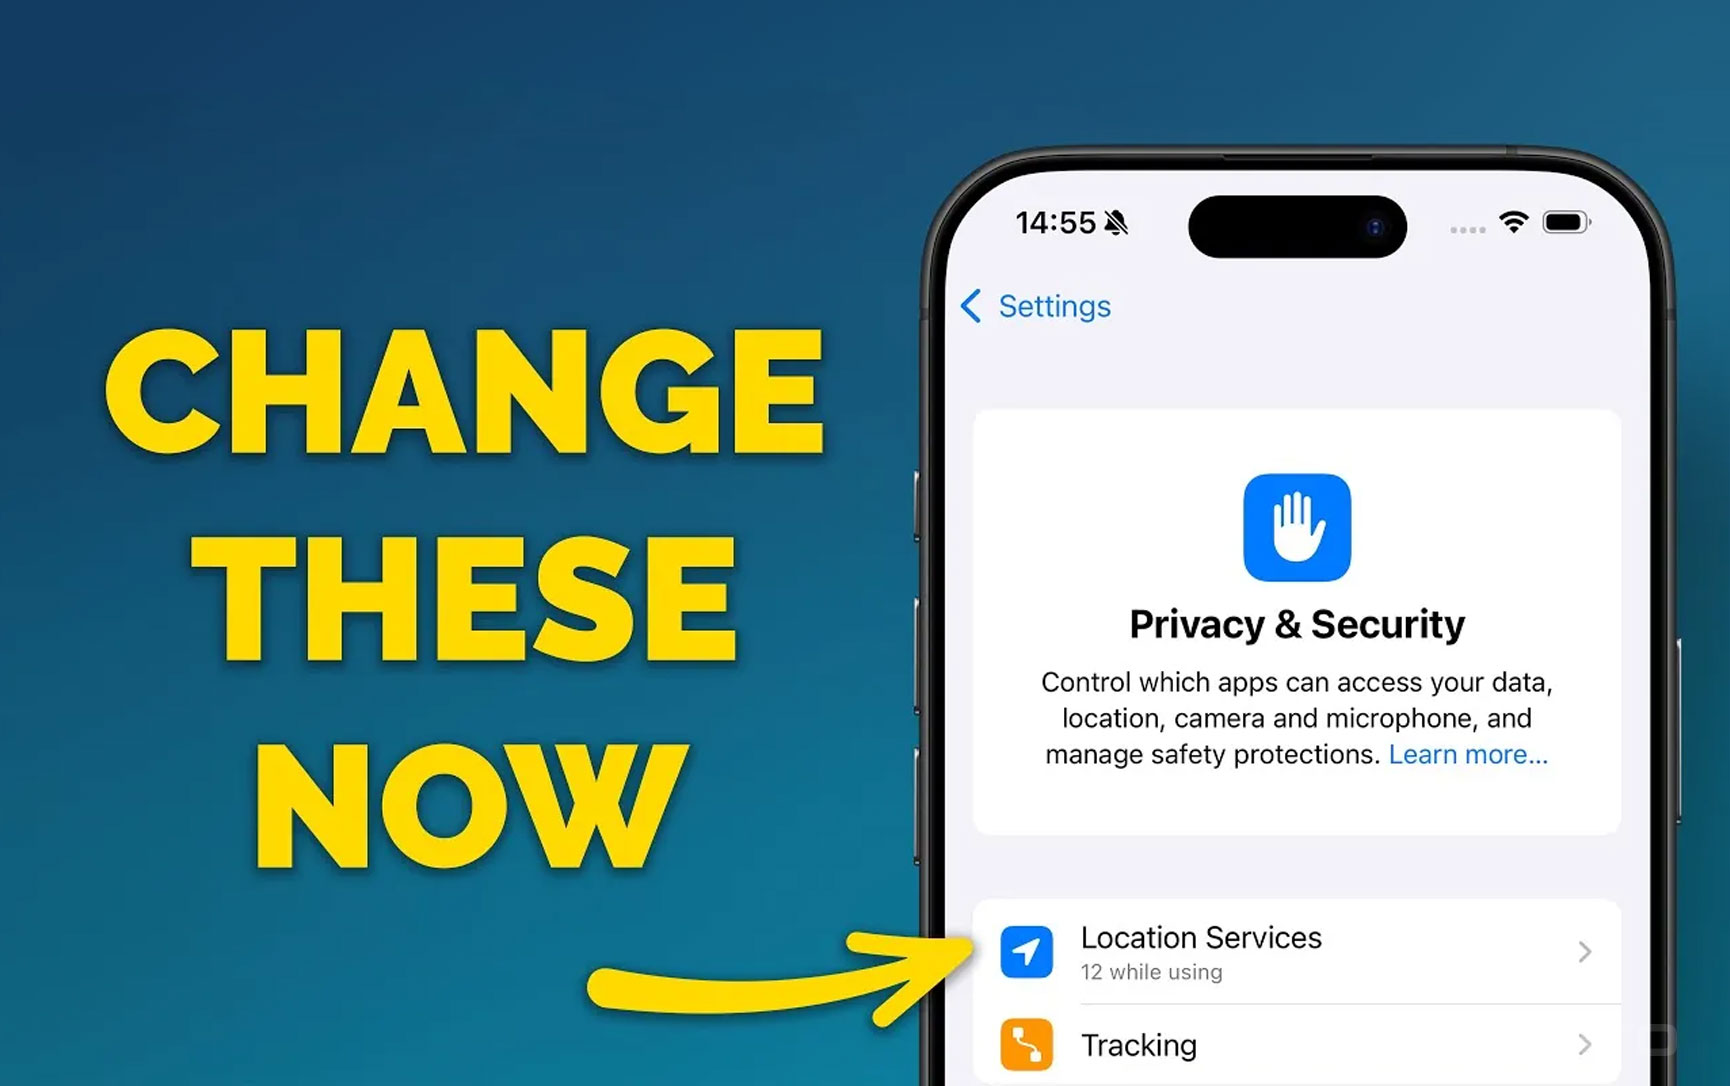
2. Lock Down Location Access — No More 24/7 Stalking
Settings → Privacy & Security → Location Services
- WeChat, Shopping Apps → “While Using the App”
- Games, Ad-heavy Apps → “Never”
- System Services → Turn OFF “Significant Locations”
Battery + Privacy Win: Background tracking drains power and reveals your routine.
3. Enable Mail Privacy Protection — Hide Your IP & Open Time
Settings → Mail → Privacy Protection
Turn ON “Protect Mail Activity”
Senders can’t see when, where, or on what device you open emails.
4. Must-Enable: 2FA + Stolen Device Protection
Essential Security Features Comparison
| Feature | Path | Protection |
|---|---|---|
| Apple ID 2FA | Settings → [Your Name] → Password & Security | Password stolen? Still can’t log in |
| Stolen Device Protection | Settings → Face ID & Passcode → Stolen Device Protection | Thieves can’t reset or sell your phone |
| Locked Notes | Notes → Long-press note → Lock | Face ID protects sensitive info |
5. Secure Your Lock Screen — Hide Sensitive Previews
Settings → Notifications → Show Previews → Choose “When Unlocked”
Lock screen shows “Message” but not the content.

Someone grabs your phone? They won’t see bank codes or private chats.
Your 3-Step Action Plan
| Do It Now | Do It Later |
|---|---|
| Turn off App Tracking | Audit all app permissions |
| Enable 2FA | Update to latest iOS |
| Hide lock screen previews | Lock sensitive notes |
Final Word: Privacy Is a Habit, Not a Setting
Apple gave you the strongest lock — but you hold the key.
Spend 10 minutes today to gain peace of mind for life.
You’re not just protecting a phone.
You’re protecting your digital life.
Take Action Now! Open Settings and follow this guide step by step.
Comment below when done: “I’ve locked down my iPhone privacy!”
Frequently Asked Questions
1. Which iPhone privacy setting is most important?
Disable “Allow Apps to Request to Track” and enable 2FA — the two biggest wins.
2. Does App Tracking Transparency actually work?
Yes! It blocks cross-app profiling, reducing targeted ads by over 70%.
3. How do I stop apps from always knowing my location?
Settings → Privacy & Security → Location Services → Set apps to “While Using” or “Never”.
4. How to enable Stolen Device Protection?
iOS 17.3+: Settings → Face ID & Passcode → Stolen Device Protection → Turn ON.
- iPhone privacy settings
- stop app tracking
- iOS security
- Apple 2FA
- location permissions
- mail privacy protection
- iPhone lock screen privacy
- iOS 18 privacy